As these are going to be back to back double pages I started to figure out how the information should be divided up. The information I wanted to include for each recipe was:
- Ingredients (tools needed)
- Approximate time process takes.
- Which studio it is available to do at (Blenheim or Vernon)
- Costs that need to be considered.
- The instructions.
- A tip.
I have split the infomation into the following:
1st side:
- Ingredients (tools needed)
- Approximate time process takes.
- Which studio it is available to do at.
- Costs that need to be considered.
2nd side:
- The instructions.
- A tip.
I sketched up some thumbnails for page combinations, these are shown below:
I found that with the layouts, the amount of text that I was going to be communicating, specifically on the instruction pages, that the layout would have to be in some way exciting, or experimental with a combination of image and text so that the book did not appear boring and unattractive for the audience to read. For this reason I have chosen a layout that combines both illustration, photographs and text. I decided to implement illustrations through expression as the tools as a few students may have forgotten what some of the tools look like, or even so may not have used them before. For example we are not taught to use the hydraulic nipping press, and so some people may be able to visialize what this too looks like. However with help of some simple illustrations it could become recognisable. This layout also plays with orientation of text. As my page formats are going to be quite text based, I wanted to experiment with how I could at least make this a little more fun, and less humdrum for my young readers through experimenting with text orientation.
Below I have drawn out the layout in more detail, with exact references to pictures and text placement.
It can be seen in the drawings that my page layouts, especially the first side follow the rule of thirds, in which the page can be split into 3 coloums and rows. I will use this grid as a guide to place boxes for both images and text. However I will break it down even further for more accuracy, taking advantage of a 9 column by 9 rows grid.
Below I have used a 9x9 grid to place boxes for images and text.

The grid below shows 2 side coloumns for photographs,
A top box for a title.
A middle box for the ingredients and illustrations.
and bottom box for information such as, time it takes, studios and costs.

The other side of the pages offers spacing for:
2 columns of photographs.
2 columns for instructions.
1 box for a tip.

I went into illustrator and started to mock up the titles which I would then drop into the layouts. I wanted all of the titles to be consistent, as I would be using a mix of text, illustration, photography aswell as 7 different print processes. Using my thumbnail for reference I created a series to cover each print process.

I then went to drop each of these into the page layouts for the 7 processes. As all of my page layouts will be exactly the same, I am using just one (Screenprint) to show how the page design was built up.
Below shows the grid with the title dropped in:

I then added in the image traced versions of the illustrations I had previously done for each print process regarding the 'ingredients' you would need to successfully complete each of theme. I placed these along with text labels of what each bit of equipment was in the central box.

Next I completed the third central box which houses information such as the amount of time the process takes, where the process is available to do and what costs you need to consider.

Next I moved onto the design on the back of this page that displays information such as the simple instructions of how to do each process and a tip which I think will help other students when using the print rooms.

Next I went into the print rooms (Blenheim and Rossington) and took a large quantity of images which I could use for the left and right borders on each of the pages. I would then narrow these down to 2 for each print process, one to use on the front of each recipe page and the other to use on the back.
Below is the selection of images I took:


From these images I chose two for each print process.
I then edited each of the images in photoshop, editing elements such as levels, curves, and adding warming/cooling filters aswell as a black and white filter over all, for consistency.
I also used photoshop to resize the images so that they would be the perfect size for the columns at the left and right hand sides of the pages.
I placed these into the columns on the pages:


Next I began working on each of the typographic pages that would use a quote/fact about printing, I already had a few ideas in mind and so I began to draw up a sketch for each one:
I began with foiling. I knew that I wanted to make the typographic page for foiling quite elegant as foiling seemed to represent a sense of this. I wanted to create my own elegant and scripted font using the quote I had found,'Cannot be achieved using traditional ink printing'. As I am not 100% confident with hand drawing typography from scratch I decided to take an already existing typeface and edit it slightly to create my own individual poster. As foiling creates an elegant attitude, I decided that this process would work best with the use of serif type and swashes. For this reason I chose a serif typeface called mermaid:

I printed the above quote out in this typeface, which I then traced through to a piece of layout paper.
after I had done this, I began adding my own swashes and extra details to the typeface, which I assumed would create a more elegant demeanour. I filled this in black for easy Image tracing. Below is the final result, ready to be added into the page layout when needed.

Next I started working on the flock typographic/illustrative page. For this design my idea was to emphasise how flock changes the feel of a design both physically and mentally. Therefore I went with the short phrase 'makes design tactile.' For the illustrative part of the page I wanted to play with the idea of touching a piece of design, the final Idea I came up with was to make the phrase look as if it was on a piece of paper with some hands touching it.

I took this into illustrator to prepare it for fabric screen exposure (flocking). I knew that when I created the page designs that I wanted each of them to be somewhat different. I chose the typeface Arteyu to work with for this, which I added my own twist to by adding extra strokes in the shape of smal lines to the bottom of each letter.
The typeface then inspired the type of illustration I did, Arteyu is modern yet gothic, which pushed me to change the illustration from a regular drawing of hands to a more gothic approach inspired by the typeface.

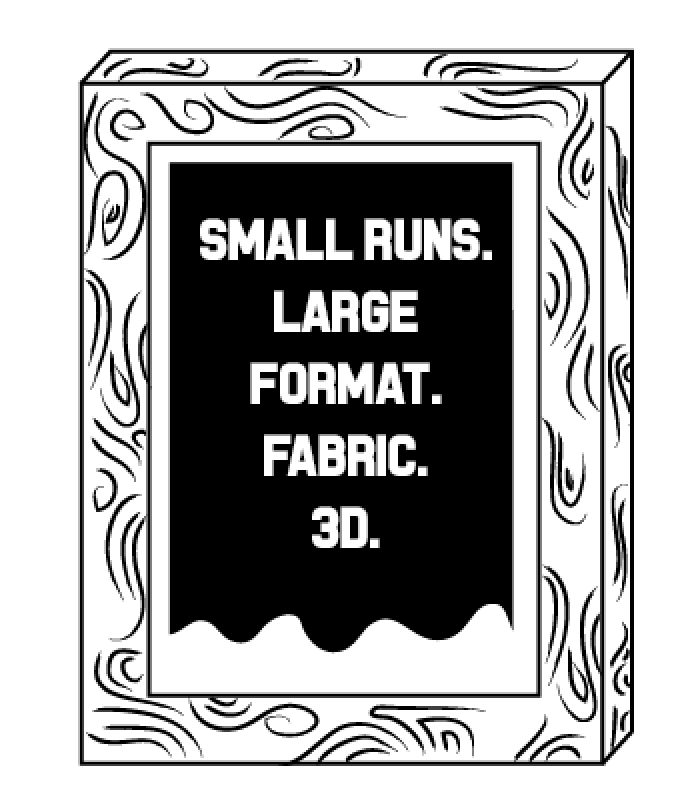
Next I sketched up ideas for screen print. This was a pretty simple idea that didn't take much planning. I wanted to create a piece that incorporated the process of the piece into the illustration. Therefore I came up with the idea to write the products which you are able to screen print upon, and the runs that it is best for onto a screen. So essentially, the design would be a screen print of a exposed screen being screen printed.

I followed the same idea of illustrating the process for my lino print, I wanted to create an illustration using the quote I had found 'Most direct print process' that almost displayed the lino print happening. therefore the illustration I drew up shows the idea that the quote I found is being cut as the print has taken place.

Mono print was probably the simplest of my pages to design. I didn't want to focus so much on planning this page design as monoprint is supposed to be spontaneous and unpredictable hence the quote I chose 'The beauty is in its spontaneity. Therefore for this piece I wanted to create a sort of, clean plate. Therefore I took the quote and placed it inside a simple shape which I want to laser cut and use as the plate for my mono print.

In the production stage I will ink up the lasercut plate, which I will probably make out of a think stock such as card. I'll need to use a thin stock because I will be putting the monoprint in a press, a thick stock could cause a potential emboss. When printing I plan on finding textures to place inbetween the plate and my chosen stock in order to create random imprints and subtractions from the original plate.

The laser cutting quote that I used was made up by myself. 'Saves you from cutting your hands with a scalpel'. I did a very clear illustration that reflected exactly what the quote said. The illustration shows a hand at the top of the illustration bleeding from a scalpel cut, and the quote written underneath in a font that creates the idea of dripping, much like the blood dripping out of the wound is what is creating the words.


When producing the design I knew that for it to work within a laser cut format that I would have to make sure all sections of the illustration were attatched to one another to make sure no pieces fall away or are disconnected. For this reason I had to place lines across each of the lines of text to ensure that all the letters/words would be attached to one another. This design would still be very delicate as the connection between each word/section of the illustration is quite thin and so it will be best to laser cut this from black card (as the theme is black and white) and mount it onto the same white stock that I am using for the rest of the book.
Embossing was the last page I had to design, again I feel as emboss is something that creates the perception of quality, and has a slightly more expensive look. For this reason I decided to simply take a script font and position each of the letters so that when seen in a sentence they are positioned to fit together in a new compact form rather than a traditional sentence setting.

I found a great typeface that would work both well for the design, and the process (bearing in mind I will have to cut this design out of a plywood plate), therefore I needed to make sure the font had some thickness to ensure that the paper would sink into the gaps in the plate. Below I stacked the letters to that they fit together in a compact form. With this I will need to cute the design out of a thin plywood. I have also considered that the plate I create from the laser cutter will have to be the exact page size or larger so ensure there are no unwanted indents in my page from the edges of the plate.

No comments:
Post a Comment